
Choose glasses for a diamond face shape by releasing the cheekbone peak, then checking lens landing, bridge contact, and movement. Open the detector
Glasses for Diamond Face Shape: Release the Cheekbone Peak, Then Test the Fit
For glasses for diamond face shape, start by identifying the cheekbone peak and then choose a frame that gives that width room instead of adding another hard band on top of it. When comparing frames for diamond shaped face, test the front width, lens landing, bridge, pupil position, and movement before deciding whether the rim should be rounded, angular, light, or bold.
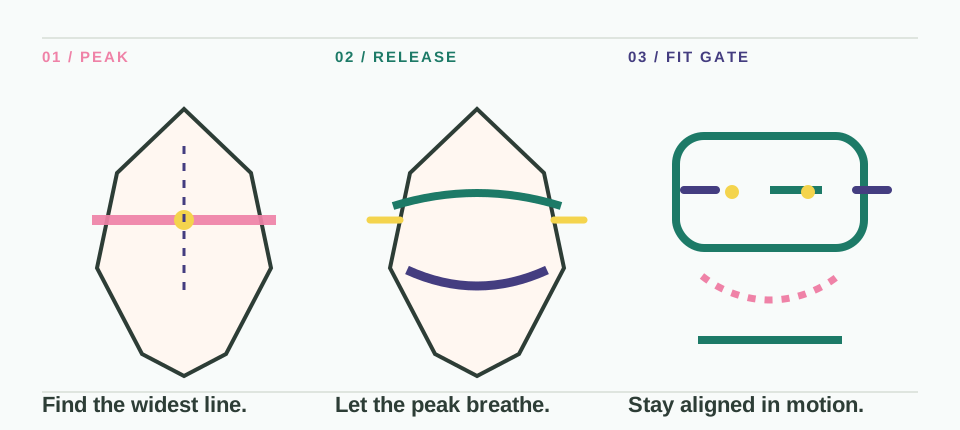
Find the Cheekbone Peak Before the Frame
A diamond reading starts with the cheekbones as the dominant horizontal width while the forehead and jaw are narrower. That pattern can still end in a pointed chin, which is why a pointed lower outline alone does not separate diamond from heart. The useful first question is which line is widest when the hair is pulled back and the head is level.
Use one straight-on view for the face and the frame. Keep the camera distance, light, and head position steady while you compare pairs. A turned head can move the apparent cheekbone peak, and a tilted image can make one rim look more balanced than it is.
Build a Two-View Baseline
Before judging a frame, record the face in two simple views:
- Outline view: Note the forehead, cheekbones, and jaw from a relaxed, straight-on view. The widest line is a sorting signal, not a final verdict.
- Fit view: Put on a pair that already feels usable and note where the outer frame reaches, where the pupils sit, and whether the bridge stays in contact.
The second view stops a style rule from replacing the measurements that make the frame wearable. If the face result changes after a turn, crop, tilt, or strong expression, repeat the baseline before changing the frame family.
Step Around the Peak, Do Not Hide It
The most useful first experiment for a diamond face is a frame that lets the cheekbone line remain readable. A softly rounded, oval, or gently curved lower line can keep the frame from copying a sharp cheekbone emphasis. A restrained browline or a light upper rim can add direction without placing the heaviest line exactly at the widest point.
This is a comparison strategy, not a ban list. A rectangle, geometric rim, or lifted corner can work when its width and rim weight are deliberate. Compare a strong horizontal edge with a softer edge at the same approximate front width. The question is not which shape name is correct; it is whether the frame adds a useful line or simply stacks another peak on the middle of the face.
For a more flexible scale comparison, use the oval-face frame guide and keep the working width before changing the line.
Let the Front Width Clear the Working Line
Start from the pair that already stays in place, then change one dimension at a time. The frame should reach the broadest useful facial line without pushing the temples outward or making the eyes look lost inside the lenses. An under-width front can make the cheekbones feel more dominant because the rim stops before the widest area. A much wider front can turn a release strategy into bulk.
Look at the outer corners and the cheek area from the front. Then check the frame from a slight turn. If the corners flare, twist, or disappear behind the cheekbone peak, record that as a landing problem instead of blaming the face-shape label.
Use the Bridge and Pupils as a Hard Gate
Put the frame on without pushing it up into place. The bridge should keep contact when you look down, and the pupils should sit in a useful position inside the lenses. A frame that creates a beautiful outline but slides down has changed its own geometry.
Check the temple bend as well. Pinching or outward flare can pull the front sideways and change the apparent width after a few minutes. For prescription glasses, ask an optician to confirm optical centering, fitting height, lens design, and usable space before treating the visual comparison as an order decision.
If the lower rim reaches the cheeks during a smile, use the round-face cheek-clearance check.
Make Lens Depth Answer the Lower Face
Lens depth changes where the lower rim lands. A deeper lens can give a narrow jaw more visual room, but it can also touch the cheeks or make the face look shorter when the bridge drops. A shallower lens may keep the cheekbone area cleaner, but it can leave too little space for a lens design or make the frame feel visually thin.
Compare depth with the same bridge and a similar front width when possible. Smile, look down, and read for a minute. Keep the depth that stays clear of the cheeks while keeping the pupils and bridge useful.
Run the Peak-Release Check in Motion
Do not approve a pair from one posed photo. Keep the light and camera position fixed, then run this sequence:
- Neutral: Check that the strongest rim does not sit exactly over the cheekbone peak unless that emphasis is intentional.
- Smile: Watch the lower rim and whether the bridge drops toward the cheeks.
- Look down: Confirm bridge contact and check whether the temples pull the front forward.
- Three-quarter turn: Look for a crooked top edge, one-sided pressure, or a frame that twists away from the face.
When a pair fails, name the failed variable: too narrow, peak emphasis, too deep, sliding bridge, off-center pupils, or temple pressure. Change that variable first. This keeps a failed try-on useful instead of restarting the whole shortlist.
For a stronger corner comparison at the same fit dimensions, use the square-face frame guide.
Keep the Prescription in the Conversation
Style direction cannot decide whether a frame leaves enough usable lens area. If you need progressive or bifocal lenses, ask whether the lens depth and fitting height leave room for the design. If the prescription is strong, ask how the chosen size affects thickness, edge appearance, and optical centering.
The bridge and temples matter here too. A frame can look balanced in a still image and become uncomfortable or optically misaligned after it slides. Let an optician make the final fitting decision after seeing the frame on your face.
Questions to Settle Before Ordering
Should diamond face glasses avoid strong top lines?
Not automatically. A strong top line can add a deliberate direction when its width, rim weight, and corner position work with the cheekbone peak. Compare it with a softer upper line at a similar size and keep the version that does not make the middle of the face feel crowded.
Are round frames good for a diamond face shape?
They are a useful first comparison because a curved outline can interrupt a repeated cheekbone angle. They still need to reach the working width, keep the bridge stable, center the pupils, and clear the cheeks during movement.
Why do my frames make my cheekbones look wider?
The front may stop inside the widest line, or its strongest rim may land directly across the cheekbone peak. Compare the outer width, rim weight, and lens landing separately before changing the face-shape description.
Can geometric frames work for a diamond face?
Yes. Test the geometry at a controlled width and watch where the corners and the strongest horizontal edge land. If the shape adds a useful direction without crowding the cheekbone area, it belongs in the shortlist.
What should I check before ordering frames for diamond shaped face?
Record the front width, lens depth, bridge behavior, pupil position, cheek clearance, temple pressure, and prescription requirements. Then repeat the neutral, smile, look-down, and three-quarter checks. The face label selects a starting group; stable alignment selects the pair.
Keep the Frame That Clears the Peak
For glasses for diamond face shape, begin with the cheekbone peak, compare how the rim lands around it, and let the bridge, pupils, cheeks, temples, and prescription space decide. A softer curve is one useful direction, not a rule. The pair worth keeping is the one that leaves the widest line readable while staying aligned when your face moves.