
Choose glasses for an oblong face shape with a width-plus-lens-depth gate, then check bridge contact, cheek clearance, and movement. Open the detector
Glasses for Oblong Face Shape: Add Width, Then Check Lens Height
For glasses for oblong face shape, start with frames that reach the cheekbone line and add useful lens depth without touching the cheeks. Wide rectangles, soft squares, wayfarers, browlines, aviators, and lifted cat-eyes can all be starting tests; the right pair is the one that interrupts the long vertical read, keeps the bridge stable, centers your pupils, and survives movement.
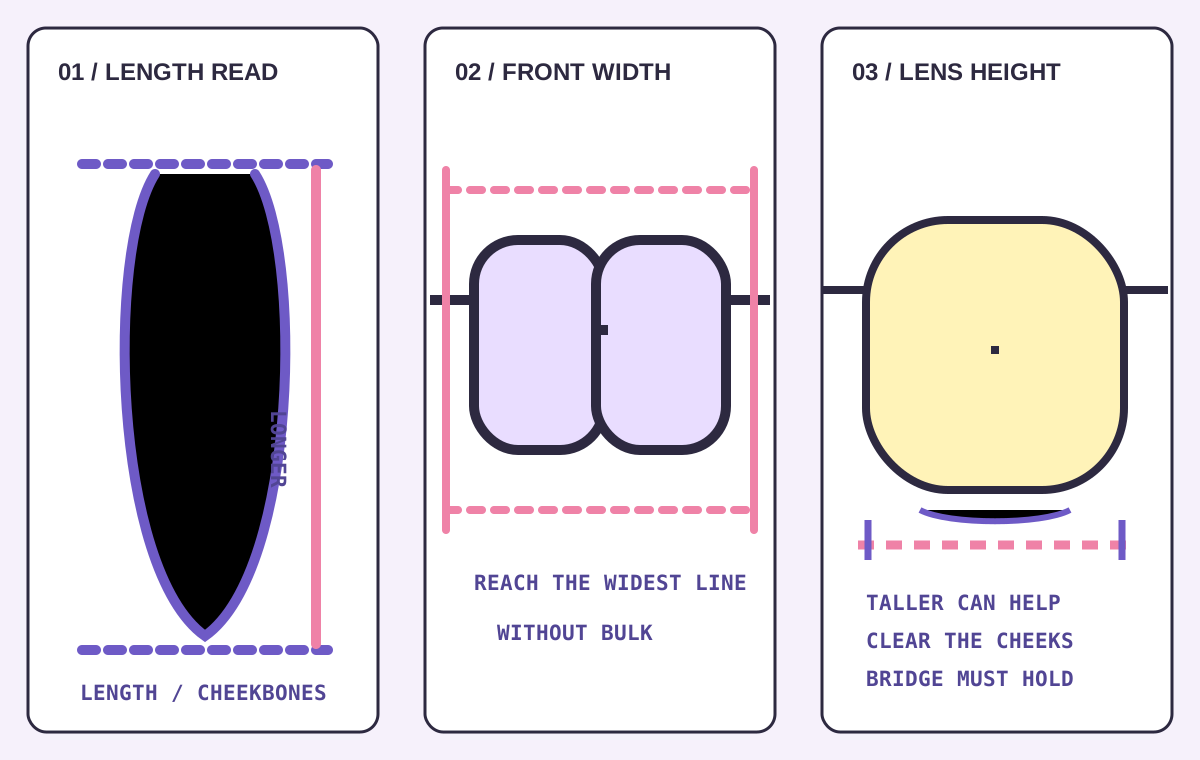
Confirm the Long Read Before Shopping
An oblong pattern starts with length, not a frame label. Pull the hair back, use a straight-on photo, and compare the distance from the center hairline to the chin with the cheekbone width. If length is clearly dominant while the forehead, cheekbones, and jaw stay fairly even, the face has a long, relatively steady horizontal profile. That is a useful starting description, not a prescription for one frame shape.
Keep the camera level and use the same view for every try-on. A tilted phone can exaggerate one side of the face, while hair or a high camera angle can hide the line you are trying to compare.
Use Length and Width as One Gate
Record four readings in the same order: forehead, cheekbones, jaw, and length. Use cheekbone width as the reference, then calculate face_ratio = length / cheekbones. A higher ratio supports a longer-face comparison, but the ratio should travel with the width order and the jaw outline. It cannot decide the best glasses by itself.
When comparing frames, write down total front width, bridge width, lens width, lens height, and temple length. The numbers inside the arm are more useful than a vague label such as small or large. Start from a pair that already stays comfortable, then change one dimension at a time.
For a softer longer-face comparison, use the oval-face frame guide and keep the width that already reaches the cheekbone line.
Add Width Where the Face Is Widest
The first frame test should reach the cheekbone line without turning into a bulky mask. A medium-to-wide rectangle, softened square, wayfarer, browline, or a frame with visible temple detail can add a horizontal route. If you prefer a rounder outline, compare a larger, stable frame rather than a tiny circle that ends inside the widest facial line.
The goal is not to make the face look short. It is to stop the eye from reading one uninterrupted line from forehead to chin. The frame should create a deliberate cross-line while leaving the eyes, bridge, and temples comfortable.
If the lower rim reaches the cheeks, use the round-face cheek-clearance check before changing the frame family.
Compare Lens Height Without Losing Cheek Clearance
Lens height is the second gate. A taller lens can add visual depth and interrupt the long vertical read, but it fails when the lower rim lands on the cheeks or drops because the bridge is unstable. Compare two frames at the same front width: one with a shallower lens and one with more height. Keep the taller option only if the lower edge remains clear when you smile and look down.
For progressive or bifocal lenses, usable lens height is also an optical constraint. Let the optician confirm the lens design, fitting height, and pupil position instead of choosing a frame from a selfie alone. Style can make the shortlist; the prescription decides what remains usable.
Make the Bridge and Pupils Non-Negotiable
Put the frame on without pushing it upward. The bridge should stay in contact while you tilt your head down, and the pupils should sit in a useful position inside the lenses. Check that the temples rest along the head instead of pinching, flaring, or pulling the front out of alignment.
If a wide frame looks balanced but slides, reduce the bridge problem before changing the whole frame family. If the bridge is secure but the eyes look crowded, check lens width and optical centers before adding more height.
For a stronger corner comparison, use the square-face frame guide without giving up the width and bridge measurements.
Run the Five-Minute Movement Test
Do not approve glasses for oblong face shape from one still pose. Use the same lighting and run this short sequence:
- Look straight ahead and record whether the front reaches the cheekbone line.
- Smile and check that the lower rim clears the cheeks.
- Look down and confirm that the bridge does not slide.
- Turn three-quarters and check that the temples do not flare.
- Read for five minutes, then record pressure, lens position, and the first point that moved.
If the pair fails, keep the dimension that passed and change only the failed variable. A width failure calls for a different front width; a cheek failure calls for lens depth or bridge work; a temple failure calls for adjustment or a different temple length.
Choose the Frame Family After the Measurements
Use the visual effect as the final filter:
- Wide rectangle or soft square: adds a clear cross-line while keeping the frame easy to compare.
- Wayfarer or browline: gives the upper edge more presence and can make the horizontal route easier to read.
- Aviator: adds lens depth, but the bridge and lower rim need a real movement check.
- Lifted cat-eye: sends the outside line toward the temples instead of repeating a straight vertical read.
- Round or oval: can work when the scale is large enough and the front stays stable; a small circle is a separate test, not the default.
These are starting families, not guarantees. The frame that fits your bridge and prescription gets to stay on the shortlist even when its label is not the expected one.
Repair the Gate Without Restarting
If the first pair is too narrow, keep its lens height and test a wider front. If the width works but the lower rim reaches the cheeks, keep the front width and reduce lens depth or adjust the bridge. If the measurements work but the frame feels visually flat, add temple detail or a stronger top line without changing the fit dimensions first.
This order prevents a style preference from hiding the real failure. Make a small comparison, record the result, and only then decide whether the frame family deserves another try.
Questions to Resolve at the Fitting Desk
Is a tall lens always better for an oblong face?
No. Lens height can add useful depth, but a tall lens that touches the cheeks or drops on the bridge has failed the practical gate. Compare height only after the front width and bridge are stable.
Should oblong-face glasses be wider than the cheekbones?
They should reach the cheekbone line and may extend slightly beyond it, depending on the bridge, temples, prescription, and how the frame moves. More width is not automatically better once the eyes look undersized or the front becomes unstable.
Are small rectangular frames a bad choice?
Not automatically, but a narrow rectangle can leave the longest facial line visually unbroken. Test it against a wider version at the same lens height and keep the pair that creates a useful cross-line without crowding the eyes.
Can aviators or cat-eye frames work on an oblong face?
They can. Aviators add lens depth, while a lifted cat-eye can move the outer line toward the temples. Both still need the bridge, pupil position, cheek clearance, and movement checks.
What should I record before ordering glasses for oblong face shape?
Record total front width, lens width, lens height, bridge width, temple length, pupil position, lower-rim clearance, and the first movement failure. Take the record to an optician when the prescription or lens design needs a final fitting decision.
Keep the Frame That Breaks the Line and Stays Put
For glasses for oblong face shape, begin with a clearly longer face pattern and a frame that reaches the cheekbone line. Then compare lens height, bridge contact, pupil position, cheek clearance, temples, and movement. The winner is not the pair that hides the face. It is the pair that adds a useful horizontal route and stays aligned after you stop posing.